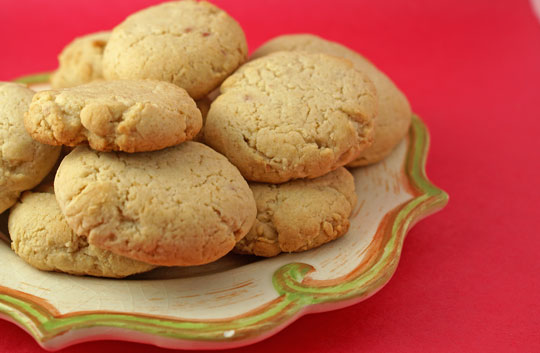
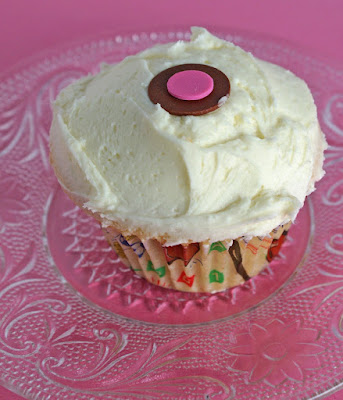
This weeks TWD, was chosen by Heather of Randomosity and the Girl. The cookie madness continues with her choice of Buttery Jam Cookies. It is a really simple and easy recipe to make. Dorie's instructions call for apricot jam, however I used Raspberry (as it was what was in my fridge). I did pull them out of the oven after a few minutes, to flatten them out a bit.
These were an interesting "cookie", in fact I'm thinking these are more like biscuits rather than cookies. They have a "cakey" texture, and the jam flavor was very mild. I can see them being served with afternoon tea. :) I personally, am a "crispy cookie" girl..... so most likely this recipe will not be repeated. But that said, I always enjoy making a new recipe regardless of the outcome.
Tuesday, December 16, 2008
Friday, December 12, 2008
Hazelnut Brownies
This is hands down, one of the best brownie recipes I have ever made. If you love chocolate, you will love this. I also happen to love the Hazelnut flavor. There is not much more to say about this one, other than it Rocks!! :) *This is recipe is gluten free, however you can substitute all purpose flour.
Wheat Free Hazelnut Brownies
*recipe originally from Karina's Kitchen
5 ounces dark chocolate with hazelnuts
4 oz unsalted butter (8 tablespoons)
2 large eggs
1 cup packed light brown sugar
1/2 rounded cup hazelnuts, processed into a fine meal
1/4 cup white or brown rice flour
1/2 teaspoon sea salt (regular will do – use slightly less)
1/4 teaspoon baking soda
2 teaspoons vanilla extract
1/2 cup extra semi-sweet chocolate chips
Preheat the oven to 350 degrees F. Line an 8×8-inch square baking pan with non-stick foil or parchment
Melt the dark chocolate and butter together in microwave or in a bowl set over simmering water.
In a mixing bowl, beat the eggs with an electric mixer until frothy. Add the brown sugar and beat until smooth. Add the melted chocolate mixture to the egg-sugar mixture a little at a time and beat well.
In a bowl, combine the nut meal, rice flour, salt and baking soda. Add the dry mixture to the chocolate mixture and stir until well mixed. Add the vanilla, beat another half a minute or so. Stir in the chocolate chips. Pour into the lined pan.
Bake on center rack for 33 to 35 minutes, or until the brownies are set. Don’t overcook.
Cool on a wire rack; and remove the brownies from the pan by gripping the foil edges. Chill before cutting.
Makes 9-12 servings.
Labels:
Brownies,
Gluten Free
Tuesday, December 9, 2008
Tuesdays with Dorie- Grandma's All-Ocassion Sugar Cookies
Cookies, Cookies, Cookies this month! The first three recipes, this month, for TWD are cookie recipes... "Tis the season". This weeks recipe was chosen by Urlike, of Kuchenlatein. (For the recipe click here.) These yummy little sugar cookies, were fairly simple to make. I made a little Lemon Glaze (powdered sugar and lemon juice) to ice the cookies and added some sprinkles.
I hate to admit it, but it was one of those weeks where I was in a rush to get these done, and did not put too much creativity into them.. oppssss, sorry! (I also know, that I will be decorating these cookies.. Christmas style, with my nieces and nephews later month.. so I am saving myself for that.. ha ha)
The dough, I found, was a bit tough to work with.. so sticky and mine was nearly impossible to cut. But really they were worth it! A great little sugar cookie.. buttery, flaky and light... I would definitely repeat it. But next time, I will be taking a cue from my cousin Lynne, and doing the slice and bake. Thanks Urlike.. great choice!
Thursday, December 4, 2008
Oatmeal Cookies
The past few days (at home) my cable, Internet and phone have all been out due to my lovely friend Comcast (GRRR). Normally this would not phase me if I had a good book to dive into, but alas I am almost done with Breaking Dawn (the last in the Twilight series. Which by the way I loved and eh hem, am reading for the 2nd time.. ssshhh don't tell anyone, K?? I know, don't say it, I have issues... but in my defense, the movie made me do it! he he I started to re-read Twilight again ....it had been so long I could not remember the details of it & wanted to compare it to the movie ... then I got sucked in again!).
So what is a girl to do when she is home, has no book and no TV to entertain her??? BAKE of course! I spent my "procrastination" time at work yesterday, searching for something to entertain me & bake for the evening. Of course there was so much to choose from, but because I had these ingredients on hand I decided to give these Oatmeal Cookies a spin. I found the recipe on Smitten Kitchen, who's site I absolutely love.... fantastic recipes and gorgeous photos. The original recipe is from Cooks Illustrated.I adapted the recipe & made the cookies Gluten Free (using Pamela's GF Flour Mix & Gluten Free Oats) but will post both versions. They were just lovely, light and crispy.. just as I prefer Oatmeal Cookies. (I am so not a fan of really heavy/cakey ones). Next time I would add some cinnamon, as I think it might just give it an extra kick.... Regardless, they were just delicious and probably the best oatmeal cookie I have made to date....
Crispy Salted Oatmeal Cookies
yields 24 cookies
Adapted from Cook’s Illustrated
1 cup all-purpose flour (for GF version, use 1c Pamela's Mix)
3/4 teaspoon baking powder (do not add BP, if using Pamela's)
1/2 teaspoon baking soda (only 1/4 tsp for Pamela's)
1/4 teaspoon table salt
14 tablespoons (1 3/4 sticks) unsalted butter, slightly softened
1 cup sugar
1/4 cup packed light brown sugar
1 large egg
1 teaspoon vanilla extract
2 1/2 cups old-fashioned rolled oats (Bobs Red Mill makes awesome GF Oats..)
1 c Chocolate Chips (I just added this on the fly, the recipe did not call for it)
1/2 teaspoon flaky sea salt (for sprinkling on top)
1. Preheat oven to 350 degrees. Line baking sheet with parchment paper. Whisk flour, baking powder, baking soda, and table salt in a medium bowl.
2. Beat butter and sugars until light and fluffy. Scrape down bowl with rubber spatula, then add egg and vanilla and beat until incorporated. Scrape down bowl again. Add flour mixture gradually and mix until just incorporated and smooth. Gradually add oats and chocolate and mix until well incorporated.
3. Divide dough into 24 equal portions, each about 2 tablespoons. Roll between palms into balls, then place on lined baking sheets about 2 1/2 inches apart. Using fingertips, gently press down each ball to about ¾-inch thickness.
4. Sprinkle a flake or two of sea salt on each cookie
5. Bake until cookies are deep golden brown, about 13 to 16 minutes, rotating baking sheet halfway through. Transfer baking sheet to wire rack to cool.
Labels:
Cookies,
Gluten Free
Tuesday, December 2, 2008
Linzer Sables- Tuesdays with Dorie
This weeks Tuesdays with Dorie was chosen by Dennis, of Living the Life... Linzer Sables. I, of course, had never made these yummy little cookies & was excited to try out something new. The recipe calls to use pecans, walnuts or hazelnuts in the dough. I choose Hazelnuts as I have a big bag of them on hand, and I just love the flavor.This was a very easy recipe to put together. I rolled mine out, and put it in the freezer for 45 minutes... and got to work. I found that I had to work very quickly as the warmer the dough got, the harder it was to work with. I decided to try two different fillings... Raspberry Jam & Nutella. They were just delicious... in fact, I had to get them out of my house immediately for fear of devouring them all!!
Tuesday, November 25, 2008
Tuesdays with Dorie- Thanksgiving Twofer Pie
This time of year is always busy, and I only was able to squeeze in 2 of the Tuesdays with Doire this month. I completed the first one & have been holding out for this weeks recipe chosen by Vibi of La casserole Carree. I was pretty excited when I heard that the pie was a combo of my two favorites.. Pumpkin Pie and Pecan. My Grandmothers Pecan Pie is an absolute favorite in my family... I look forward to it always. As well, my mothers Pumpkin chiffon pie.. it is so light and fluffy. Yum. I figured, how could this possibly go wrong??
I hate to say it, but I did not like this pie at all... the only appropriate word that comes to my mind is "ICK". I was so bummed. (perhaps it was baker's error on my part, although I did follow the recipe to a T. or maybe I am just a plain old traditionalist when it comes to pies?? ) As I was explaining to my cousin Lynne, who also is a member of TWD, the pumpkin part was somewhat flavorless (maybe needed more spices??). I also was not crazy about the taste of the two mixtures together. Oh well, with 100's of recipes in Dorie's book... it is nearly impossible to win them all. It happens... regardless I am looking forward to the next adventure in TWD. No doubt it will turn out better!
Labels:
TWD
Friday, November 21, 2008
Caramelized Onion-Apple Bites
This year for Thanksgiving, we are going to my sister's... a usual holiday in my family, lots of people and kidos running around. I think 14 people?? Honestly, I lose count.. but the more the merrier! One of my "assignments" this year is to do an appetizer. So, I have been on the hunt for something new to try. Don't get me wrong, I love the usuals that we do... baked brie, bacon wrapped water chestnuts, crab stuffed mushrooms.... to name a few. But sometimes it is nice to change it up a bit, ya know?
I found this recipe Caramelized Onion-Apple Bites, and gave it a test run last night. It was wonderful....(I did make a few adjustments, like leaving out the salt. It doesn't need it) Aside from the fact that it was delicious, I love it that the onion/apple topping can be prepared up to 2 days ahead of time (big bonus at this busy time of year). This one is a keeper...
Makes 32 hors d'oeuvres
Ingredients
* 3 tablespoons unsalted butter
* 1 pound yellow onions, thinly sliced
* 2 Granny Smith or other tart apples, peeled, cored, and thinly sliced
* 1/4 teaspoon freshly ground black pepper
* 1 sheet frozen puff pastry, defrosted just before use
* 3 ounces fontina cheese, shredded
* 1 tablespoon minced fresh thyme leaves
Preparation
1. Melt butter in a large frying pan over medium-high heat. Add onions and 1/2 tsp. salt. Cook, stirring occasionally, until onions are soft, about 5 minutes. Add apples and stir to coat. Reduce heat to medium and cook, stirring often, until onions are medium brown, about 30 minutes. Stir in pepper and salt to taste. Set aside and let cool, about 10 minutes.
2. Preheat oven to 375°. Unwrap puff pastry sheet. Cut sheet into 16 squares, then halve those squares diagonally to make 32 triangles. Arrange them, not touching, on a baking sheet.
3. Place a spoonful of cooled onion-apple mixture on each triangle. Top with a sprinkle of shredded cheese and minced thyme. Bake until puffed and golden, 15 to 20 minutes. Serve hot.
*These savory hors d'oeuvres can be assembled in advance—ideal for relaxed entertaining. Prep and Cook Time: 1 1/2 hours. Notes: The onion-apple topping can be made up to 2 days ahead. The triangles can be prepared, covered, and chilled the morning of a party, then popped into the oven when guests arrive. They can also be frozen, wrapped well, for up to 3 months (do not defrost before baking).
Labels:
Appetizers
Monday, November 17, 2008
Sour Cream Coffee Cake
Coffee cake has always been a favorite in my family, as well as crumb cake. It is tradition, that we serve it while opening presents on Christmas morning... before we make our big breakfast. Between my sibling's families there are 5 kiddos (soon to be 6) that demand we get down to business, ie. opening gifts, before we cook breakfast (who can blame them!! ). I am always looking for great coffee cake recipes... (often times we are lazy and buy Entenmann's .. which by the way is damn good!)
This is a classic recipe using sour cream & it is from a dear family friend... Last night I was feeling up for a challenge and decided to see if I could succeed making it gluten free. It turned out wonderfully! I was very pleased... you never would have known it was GF (which is not always easy to achieve). I am posting the original recipe, with my gluten free adjustments next to it. *if you use Pamelas GF baking mix.. please remember that you must adjust the baking powder & baking soda measurements. The leavening in Pamela's is equivalent to 1 tsp baking powder & 1/4 tsp baking soda per cup.
Cake
1/2 c butter
3/4 c sugar
2 eggs or 1/2 c egg substitute
1 cup light sour cream
1 1/2c flour (I used Pamela's Gluten Free Baking mix)
1 1/2 tsp baking powder (do not add)
1 tsp baking soda (5/8 tsp)
1 tsp vanilla
Filling/Topping
1/2 c Brown Sugar
1 tsp cinnamon
1/2 c chopped nuts (I used pecans)
Preheat oven to 350 degrees. Grease baking dish (or tube pan)... I used a 9'"x 13". In a large bowl, cream butter & sugar. Beat in egg substitute. Add sour cream & mix well. Combine the flour, baking powder & baking soda. Add flour mixture to egg mixture, mixing well. Add vanilla. To prepare the topping, combine the brown sugar, cinnamon and nuts. Place half of the batter in baking dish & sprinkle with half the topping. Repeat. Cut through the batter several times with knife. Bake 45-50 minutes. Makes 12 servings.
This is a classic recipe using sour cream & it is from a dear family friend... Last night I was feeling up for a challenge and decided to see if I could succeed making it gluten free. It turned out wonderfully! I was very pleased... you never would have known it was GF (which is not always easy to achieve). I am posting the original recipe, with my gluten free adjustments next to it. *if you use Pamelas GF baking mix.. please remember that you must adjust the baking powder & baking soda measurements. The leavening in Pamela's is equivalent to 1 tsp baking powder & 1/4 tsp baking soda per cup.
Cake
1/2 c butter
3/4 c sugar
2 eggs or 1/2 c egg substitute
1 cup light sour cream
1 1/2c flour (I used Pamela's Gluten Free Baking mix)
1 1/2 tsp baking powder (do not add)
1 tsp baking soda (5/8 tsp)
1 tsp vanilla
Filling/Topping
1 tsp cinnamon
1/2 c chopped nuts (I used pecans)
Preheat oven to 350 degrees. Grease baking dish (or tube pan)... I used a 9'"x 13". In a large bowl, cream butter & sugar. Beat in egg substitute. Add sour cream & mix well. Combine the flour, baking powder & baking soda. Add flour mixture to egg mixture, mixing well. Add vanilla. To prepare the topping, combine the brown sugar, cinnamon and nuts. Place half of the batter in baking dish & sprinkle with half the topping. Repeat. Cut through the batter several times with knife. Bake 45-50 minutes. Makes 12 servings.
Labels:
breakfast,
cake,
Gluten Free
Monday, November 10, 2008
Pumpkin Cupcakes with Cream Cheese Icing
A few years ago my dear friend, Trish, gave me this recipe for pumpkin cake (I think she had gotten it from a parent of one of her students). She just raved about how incredible it was, and insisted I make it... and oh my goodness am I glad I did. This is a "To Die For" recipe. Since then I have made it countless times and always get amazing reviews.. Today some of the reactions were "soooooooo good, OMG, amazing and someone even said they were orgasmic". Clearly this one is a keeper! *This recipe is just wonderful as cake or cupcakes.
Pumpkin Cake-
makes 24 cupcakes or 1 cake using (2 square or round pans)
Ingredients
cake
4 eggs or equivalent of egg substitute
2 c sugar
1 c oil
1 medium (15oz) can of pure pumpkin
2 c all purpose flour
2 tsp baking powder
2 tsp baking soda
1/2 tsp salt
2 tsp (heaping) cinnamon
Frosting-
8 oz cream cheese
1/2 c butter
2 c powdered sugar
1 tsp. vanilla
Preheat oven to 350 degrees. In small bowl, combine flour, baking soda, baking powder, salt & cinnamon.. set aside. In another bowl combine egg, sugar and oil. Beat till smooth, add pumpkin. Add in flour mixture in 3 parts. For cupcakes, bake for 20 minutes or until springy. For cake, bake in pan at 350 for 40-45 minutes. I would recommend two square pans or one big cake pan. If you do 2 small square do 350 for 35 minutes and regular cake pan for 40 minutes. Let it cool completely before you frost. For the frosting combine cream cheese, vanilla and butter.. cream together until smooth. Gradually add powdered sugar... "ice" away and enjoy!
Labels:
cupcakes
Saturday, November 8, 2008
Turkey-Veggie Meatballs
It is that time of year where I start to crave comfort food. Unfortunately, there is that annoying part of my brain that is still determined to TRY to keep it light and healthy. Hmph.. (I wish she would just keep quiet some days. I am kidding..well sorta ;) ) At any rate, I had some ground turkey in my fridge that needed to be used. I went to my trusty friend Cooking Light , and the Turkey-Veggie Meatball recipe popped up. It had very good reviews, but a few said that they were a bit dry. So I switched up the recipe a bit... and they were just terrific. (they freeze well too) * My photos aren't my favorite, please forgive the raw meat one.. but i wanted to show what they looked like.Turkey Veggie Meatballs -
makes 30 -serving size 5
Ingredients
1 1/4 pounds ground turkey
1/2 cup dry breadcrumbs (I used Gluten Free Breadcrumbs)
1/2 cup (2 ounces) finely shredded skim/low fat mozzarella
1/3 cup finely chopped green onions
1/4 cup coarsely shredded carrot
1/4 cup coarsely shredded zucchini
1/4 cup chopped fresh parsley
1/4 teaspoon salt
1/4 teaspoon pepper
1/4 c. egg substitute
1 tbsp minced garlic
Cooking spray
Preheat oven to 400°. Combine all ingredients except cooking spray in a bowl; stir well. Shape mixture into 30 (1 1/2-inch) meatballs. Place on a broiler pan coated with cooking spray. Bake at 400° for 15 minutes or until done.
Nutritional Information
Calories: 228 (29% from fat) Fat: 7.3g (sat 3.1g,mono 1.8g,poly 1.4g) Protein: 30.3g Carbohydrate: 8.5g Fiber: 0.8g Cholesterol: 71mg Iron: 2.5mg Sodium: 399mg Calcium: 166mg
Labels:
Cooking Light,
Gluten Free,
Meals
Tuesday, November 4, 2008
Tuesdays with Dorie- Rugelach
One of the things that I just love about baking and/or cooking is creating something new, the process of putting it together and the outcome. It is like a science experiment for me, sometimes it is a great success and sometimes it explodes into disaster. Regardless the result, I just get a kick out of it... so entering a new challenge is incredibly fun for me. This week's recipe was chosen by Grace.... Rugelach. I personally don't think I have ever had this treat, so I had no idea what to expect... perfect!
When I made the dough it came together really quickly.. in fact I was a bit concerned that I "overworked it", as Dorie warns, so I let it chill over night. I switched up the recipe a bit... as I generally am not a fan of cookies with jam or Currants/raisins. Instead for my filling, I used Maple Pumpkin Butter, mini chocolate chips, toasted pecans(chopped finely) and of course cinnamon sugar.
My dough rolled out very easily... but man was it sticky. Thankfully I had fair warning from my cousin Lynne who had made the recipe the night before. *Use lots of flour on your rolling pin and wax paper to make it easier. I decided to go the "pinwheel" route for the sake of ease...
After putting it all together, I let it chill for an hour as it had gotten very soft thru the process. I then, sliced the rolls in 1/4 inch pieces and covered them in cinnamon sugar... skipping the "basting" that Dorie's recipe called for.I have to say, the result was fantastic! The perfect "fallish" combination for me... and they have all but disappeared in the kitchen at my office. My co-workers loved them. Thank you so much Grace for choosing this recipe, which I most likely would have never tried. These will surely go into my cookie "rotation". For the recipe, please visit Grace's wonderful site.
Tuesday, October 28, 2008
Lemoncakes
I am a pretty laid back girl, but the one thing that really bugs me is when I "bomb" a recipe. Even tho there were many other bakers with issues on the last TWD, I was still not happy with the fact that it didn't turn out. And darn it, I don't like to be defeated! So as I was browsing FoodGawker yesterday (at work.. yes I know I really was working hard....oppps) I stumbled upon something that looked yummy, and I wanted to try. Just so happens I had all the ingredients on hand, and I was bored last night. So I halved the recipe and got my needed success. These lemon cakes were light, very moist and just delightful. The lemon glaze was mouth watering. I actually made them Gluten Free (by using Pamelas GF Baking Mix). *It dawned on me that this is a very similar recipe to the "Glazed Lemon Buttermilk Cake" cake I made last Easter out of "The Best of Cooking Light 9". A great recipe by the way, and was a huge hit. I served it with Raspberry Sorbet.
At any rate.. here is the recipe. Was a great little treat ( I made them as minis). Sorry I didn't take too many pictures. But thought it was worth sharing & phew... I feel better now. :) Many thanks to Emily for the recipe & inspiration. Check out her site... It is great!
Glazed Lemon Cakes
From Everyday Food: Great Food Fast from the kitchens of Martha Stewart Living
Ingredients
1 1/2 cups flour (I used Pamela's GF Mix)
2 tsp. baking powder (if using Pamelas only add 1/2 tsp of BP)
1/2 tsp. salt
1/2 cup low-fat buttermilk or plain low-fat yogurt
1 tsp. vanilla
Finely grated zest and juice of 1 lemon, plus 2 tbsp. of lemon juice for the glaze
1 cup sugar
2 large eggs ( I used egg substitute)
1 1/2 cups confectioners sugar
Preheat oven to 350 degrees (F). Spray cooking spray on muffin tin, or use paper cups.
In a medium bowl whisk together the flour, baking soda and salt.
In a small bowl whisk together the buttermilk, vanilla, lemon juice and zest. Set aside.
With an electric mixer cream the butter and sugar until light. Add the eggs, one at a time, beating after each addition. With the mixer on low speed, add the flour mixture in three batches, alternating with the buttermilk mixture.
Divide evenly among the muffin cups. Bake 20-25 minutes, until a toothpick inserted into the center comes out clean. Cool for 10 minutes in the tin, then cool completely on a wire rack. Mix confectioners sugar and 3tbsp of lemon juice for glaze.. pour over muffins. Wait 30 minutes for glaze to settle before serving.
Labels:
cupcakes,
Gluten Free
TWD- Chocolate-Chocolate Cupakes
This weeks "Tuesdays with Dorie" recipe was chosen by Clara from Iheartfood4thought. She went with Dorie's Chocolate-Chocolate Cupcakes. When I saw the choice I was pretty excited, as I really do heart cupcakes (as you may have already guessed). I followed the recipe to the"T", the batter was uber yummy, and I decided to go the mini route (by the way.. Clara requested a Halloween theme).I hate admitting it, but I was entirely disappointed in the cupcakes. They were incredibly dry... I didn't even bake them for the fully allotted time. Thankfully, I read thru the other bakers comments & a large majority had the same issue. Phew... at least I know it was not a complete bakers error on my part.. because that would upset me. ;) I think the error could have been in 2 parts. 1. I have found using butter in cake/cupcakes recipes sometimes results in dryness. Next time I would probably use oil instead... or add some yogurt to moisten it up??? 2. I did not weigh the flour, I just used my trusty measuring cup instead... I have been reading a lot lately that it is very important to weigh the flour instead. Lesson learned!The glaze however was great, and fun to work with. I used the "dipping" method, which was fun, to ice them. Sadly these little babies did not make it into my office. I have a reputation to uphold here (ha!) they went to (as my cousin Lynne calls it) the little cupcake heaven in the sky.. aka. the trashcan (gasp!) . Check out some of the other TWD bakers results here...
Wednesday, October 22, 2008
Shrimp and Broccoli Stir Fry
This was a great little recipe I tried last night from Cooking Light. It was very simple, quick to make... I halved the recipe and served it over 1/4 cup of rice. It was incredibly tasty and definitely will be repeated. Also loved the calorie count... 220 calories per serving??? Hooray! *Cooking Light also suggests that this could be used with chicken or steak, too. Shrimp & Broccoli Stir Fry - Cooking Light Jan. 2008
4 servings (serving size: 1 cup)
Ingredients
* 1/4 cup fat-free, less-sodium chicken broth
* 2 tablespoons rice vinegar
* 2 tablespoons low-sodium soy sauce
* 2 teaspoons cornstarch
* 1/2 teaspoon dark sesame oil ( I used regular sesame oil, as it was what I had on hand)
* 1/4 teaspoon crushed red pepper
* 1 tablespoon canola oil, divided
* 1 tablespoon minced peeled fresh ginger
* 1 tablespoon bottled minced garlic
* 1 pound peeled and deveined large shrimp
* 1/4 teaspoon salt
* 4 cups small broccoli florets
* 1 cup vertically sliced onion
Preparation
Combine first 6 ingredients in a small bowl, stirring with a whisk.
Heat 2 teaspoons canola oil in a large nonstick skillet over medium-high heat. Add ginger and garlic to pan; stir-fry 30 seconds. Sprinkle shrimp with salt. Add shrimp to pan, and stir-fry 3 minutes or until done. Remove shrimp mixture from the pan.
Add remaining 1 teaspoon canola oil to pan. Add broccoli and onion to pan; stir-fry 4 minutes or until broccoli is crisp-tender. Add shrimp mixture and broth mixture to pan; cook 1 minute or until thickened, stirring constantly.
Nutritional Information
Calories:v 220 (27% from fat) Fat: 6.7g (sat 0.8g,mono 2.4g,poly 1.9g) Protein: 26.2g Carbohydrate: 11.8g Fiber: 2.8g
Cholesterol: 172mg Iron: 3.6mg Sodium: 577mg Calcium: 105mg
Labels:
Cooking Light,
Gluten Free,
Meals
Tuesday, October 21, 2008
Sprinkles Cupcake Mix from Williams Sonoma
In 1980 the musical "Barnum" debuted on Broadway, it was a fabulous show and was based on the infamous P.T Barnum. The song that is playing in my head this morning is from "Barnum", "There Is a Sucker Born Ev'ry Minute" (forgive me... I have Broadway on the brain as I saw two shows in NYC last week ). And yes, indeed I am a sucker ...argh! Darn you Williams Sonoma...I saw this Sprinkles Cupcake Mix and got suckered in.I have heard such rave reviews about "Sprinkles" cupcakes and have been simply dying to try them. Unfortunately, a visit to CA is not in my near future, so this is as close as I will get. The canister comes with the "cupcake mix" that you add eggs, butter and milk too... as well as instructions for the icing.
The cupcake itself was wonderful. Very moist and rich with that famous Madagascar bourbon vanilla taste that "Sprinkles" boasts about. However, I was incredibly disappointed in the icing. I am a big fan of creamy, melt in your mouth icing... sadly this was a bit thicker and just not to my liking. I have no doubt that real thing is way better. After all was just the take home mix, and my guess was there was some "user error" on my part. ;)
*on a side note... I did walk by a Magnolia Bakery in NYC last week. Of course I had to stop. That was just the opposite experience. Their cupcakes were dry and nothing really to write home about. But their icing, oh my ...was out of this world. If only I could have combined the sprinkles cake and the Magnolia icing, I would have been in heaven!
Labels:
cupcakes
Tuesday, October 14, 2008
Lenox Almond Biscotti- Tuesdays with Dorie
I am thrilled to be joining this amazing group of bakers... Tuesdays with Dorie. What a fun way to get a "baking education" and have an excuse to experiment with recipes from Dorie Greenspan's book. This week the recipe was chosen by Canela & Comino, "Lenox Almond Biscotti". I have never made biscotti before & I must admit I was a tad intimidated. But was happily surprised that it was a fairly simple process, and the results were delicious. For my first TWD, I stuck to the basics with using just Almonds (oh and I did add cinnamon too). I noticed that I had to bake mine a bit longer than the recipe called for (which I saw was the case in many other bakers notes). There is a very special lady in my life who just adores Biscotti and loves to keep them on hand for visitors...my 96 year old grandmother, Mary. So of course I took the entire batch to her on Sunday morning. I am very happy to report that they got rave reviews. She took them to dinner and served them to her table mates. The ladies just loved them.. and apparently they had quite the discussion on what the ingredients were. Mary insisted cornmeal was one, and her table mates protested. Way to go Gram, you really know your stuff! all in all my first TWD was a success.... can't wait for the next one.
Sunday, October 12, 2008
Halloween Cookies
Last week I was killing some time over lunch by browsing one of my favorite stores, Crate and Barrel. I was busy trying to restrain myself from spending money, when I saw this fun Halloween Cookie Cutter Set. Did I mention it was on sale? Ohhh, I just couldn't resist!
It just so happens that one of my favorite holiday traditions, with my family, is decorating Christmas cookies. Since I can remember my Mom has been making this "rolled" cookie recipe with us kids... and now the grandkids. It is such a terrific recipe and so easy. So I called my sister, made a date with her and the munchkins.. then invited us over to my parents for the afternoon for a little "pre" Halloween fun!
Cookie Cutter Cookies
makes 2 dozen (roughly)
Ingredients
1 C Butter (sweetened butter- unsalted)
2/3 c sugar
1 egg
2 1/2 cups sifted all purpose flour
1/2 tsp salt
1 tsp vanilla
Cream sugar and butter till smooth. Add vanilla. Beat in Egg. Combine and add flour, salt. Chill dough 3-4 hrs before rolling. Preheat Oven to 350 degrees. Bake 8-10 minutes or until slightly colored. Let cool and decorate!
*Cookie Artwork by Jackson, Mckenzie and Austin
Wednesday, October 8, 2008
Butternut Squash Risotto
Last night, while watching the debate, I read thru some old cook books that I hadn't used in years. (I know... gasp.... I was not 100% focused on the debate.. sshhh don't tell... Oh well you can't blame a girl for multi-tasking.) Butternut Squash is one of my favorite fall produce, in fact I bought one at the store yesterday, & what great timing as I found this recipe in Williams-Sonoma "Vegetarian for All Seasons". I thought I would give it a whirl. It was very easy, hearty and enjoyable. :) I used Arborio Rice, and quartered the recipe.
Butternut Squash Risotto
Serves 6
Ingredients
1 lb Butternut Squash
7 1/2 - 8 cups Vegetable Stock
2 Tbsp minced fresh parsley (I cheated and used dried)
1/4 tsp ground Nutmeg
salt and pepper to taste
1/4 c extra virgin Olive oil
1 yellow onion, diced
1 1/2 cups Carnaroli or Arborio rice
- The original recipe calls for baking the Squash, but I was a hungry girl just home from work...so I hit the microwave. Slice Squash in half, wrap halves in plastic and cook for 6-8 minutes (individually) until tender.
- Pour stock in saucepan and bring to boil. Reduce heat to low so that it barely simmers.
- Scoop out pulp from cooled squash halves & place in food processor with 1/4 c of stock. Puree until smooth. Transfer to a saucepan & add parsley & nutmeg. Cover to keep warm, adding a little stock if the puree dries out.
- In Saucepan over medium heat, warm olive oil. Add onion & saute until softened. Add rice, stir to coat with oil, & cook until the edges are translucent (3-4 minutes). Add a ladelful of simmering stock, & continue to stir constantly over heat. When stock is almost fully absorbed, add another ladelful. Stir steadily to keep rice from sticking & continue to add more stock, as soon as each ladelful is absorbed. The risotto is done when the rice is tender but firm, about 20 minutes. Stir in 1/4 cup of the squash puree and season with salt and pepper.
- Divide remaining Puree among individual plates. Spoon risotto into ramekin, packing it tightly. Unmold the risotto on top of the squash Puree.
Labels:
Gluten Free,
Sides,
Vegetarian
Tuesday, October 7, 2008
Chai Blueberry Muffins
I adore muffins... and have a passion for ALL berries. Blueberries, Raspberries, Blackberries, Boysenberries... you name it. ( In fact I hate to admit it, but I have felt a little heart sore that berry season has ended. I was in heaven all summer.) When I saw this post on Chai-Berry Muffins... I was on a mission to make them Gluten Free. I have been in desperate need for a "go to Gluten Free Muffin", and I am happy to say VICTORY is FINALLY mine!
I played with this recipe many times. The first time I made it with regular all purpose flour, and I tested them... they of course were wonderful. Light, Fluffy and the "Chai" flavor adds a lovely fall touch.
Pamela's makes a terrific Gluten Free Baking Mix. It does already contain Baking Powder and Soda (1tsp baking powder & 1/4 tsp baking soda per cup) I made the appropriate adjustments & was so thrilled to have success! (the first time I tried this mix, I didn't realize I needed to adjust the ingredients.... and BOY was that a disaster! Oops)
I am going to post Elle's recipe with my adjustments (in green).. so that you can use the recipe either way you would like. They really are wonderful.... I served them to my Gluten eating family and they all loved them.
*note- I could not find Chai Spice at the store. However, you can mix 50% Chinese Five Spice & 50% Cardamom to get the Chai Flavor in a pinch.
Chai-berry Muffins-
makes 12
2 cups flour (2 cups Pamela's)
2 tsp baking powder (no baking powder added)
1 tsp baking soda (1/2 tsp baking soda)
1 tsp salt
1 1/2 tsp chai spice blend (3/4 tsp Chinese Five Spice & 3/4 tsp Cardamom)
1/2 cup canola oil
1/2 cup plain yogurt (I used Danon Light and Fit Vanilla)
3/4 cup sugar
1 tsp vanilla
1 pint blueberries
3/4 cup chopped pecans (I left the nuts out..)
Heat the oven to 350°. Grease a 12 muffin tin.
In a medium bowl, mix the dry ingredients.
To a larger bowl, add the oil, yogurt, sugar and vanilla, mix well with a hand mixer or by hand.
Add the dry ingredients to the wet and stir to combine a bit.
Grab a rubber spatula and fold in the berries and nuts.
Fill the muffin tins--an ice cream scoop makes for more evenly sized muffins, and it's much neater than a spoon.
Bake for about 25 minutes and check. They should be golden brown and a tester should come out clean.
Cool in pan on rack for 5 minutes or so, then run a knife around the muffins, and turn them out on the
rack to cool.
Labels:
Gluten Free,
Muffins
Thursday, October 2, 2008
Spiced Pumpkin Bread
Imagine my delight when my co-worker Sherea, brought me pumpkin fresh from her garden! Oh I just knew that it would be delicious and could not wait to bake with it.
I stumbled upon many recipes, of course, for pumpkin bread. But I found one from Bon Appétit that looked like it was a hit (it had a ton of positive reviews). One of the things that grabbed my attention was it was described as "cake like" and "sweet", 2 of my favorite combinations.
I halved the recipe.. using only 8oz. of Sherea's incredible Pumpkin! Thankfully I have 8 more ounces left to bake with. :)
This is a great recipe and certainly lived up to its rave reviews!
Spiced Pumpkin Bread
Bon Appétit November 1995
Vern Bertagna: West Frankfort, Illinois
Servings: Makes 2 loaves.
- Ingredients
- 3 cups sugar
- 1 cup vegetable oil
- 3 large eggs (I used egg beaters)
- 1 16-ounce can solid pack pumpkin
- 3 cups all purpose flour
- 1 teaspoon ground cloves
- 1 teaspoon ground cinnamon
- 1 teaspoon ground nutmeg
- 1 teaspoon baking soda
- 1/2 teaspoon salt
- 1/2 teaspoon baking powder
- 1 cup coarsely chopped walnuts (optional)
Preparation
Preheat oven to 350°F. Butter and flour two 9x5x3-inch loaf pans. Beat sugar and oil in large bowl to blend. Mix in eggs and pumpkin. Sift flour, cloves, cinnamon, nutmeg, baking soda, salt and baking powder into another large bowl. Stir into pumpkin mixture in 2 additions. Mix in walnuts, if desired.
Divide batter equally between prepared pans. Bake until tester inserted into center comes out clean, about 1 hour 10 minutes. Transfer to racks and cool 10 minutes. Using sharp knife, cut around edge of loaves. Turn loaves out onto racks and cool completely.
Labels:
Bread
Subscribe to:
Posts (Atom)